Crafting your Dream Home
Step by Step of Building your Dream Home
Posted June 5, 2024
The Building Process
Building a home is a significant undertaking that involves numerous complex steps. It’s natural to feel overwhelmed by the process, especially if you’re new to home construction. However, don’t let that discourage you! This article aims to demystify the home building journey by breaking down each step in detail. Whether you’re planning, designing, or overseeing construction, we’ll provide valuable insights and guidance to help you navigate the process smoothly. By the end of this read, you’ll have a clearer understanding of what it takes to build your dream home.
1. Demo
House Demolition: Understanding the Process
Demolition is a structured process involving careful planning and execution to dismantle a building safely and efficiently. This essay outlines the key steps involved in the demolition of a house.
Permitting and Preparation:
The process begins with obtaining permits from local authorities and conducting surveys to identify hazardous materials. Utilities are disconnected to ensure safety.
Structural Assessment and Hazard Removal:
Engineers assess the structure and plan for safe demolition. Hazardous materials like asbestos are removed by certified professionals.
Equipment Setup and Demolition:
Demolition equipment is positioned, and the demolition begins systematically, often starting from the top and working downward using mechanical or controlled explosive techniques.
Debris Removal and Site Cleanup:
Debris is sorted, removed, and disposed of according to regulations. The site is cleaned, hazardous materials are cleared, and the land may be prepared for future use.
Final Inspection and Documentation:
Local authorities conduct a final inspection to ensure compliance with regulations. Documentation of permits, inspections, and waste disposal is maintained for record-keeping.
The demolition process of a house involves careful planning, execution, and adherence to safety and environmental regulations. Professional demolition companies handle these tasks to ensure a smooth and compliant demolition process.

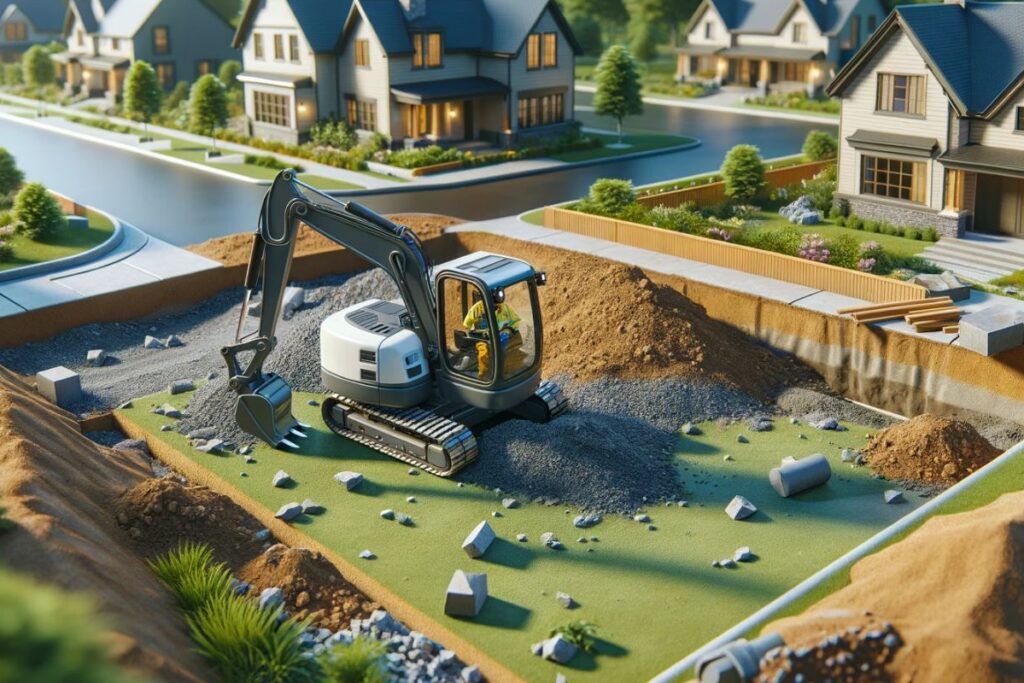
2. Level the site (excavation)
Ground Leveling: The First Step in Site Preparation
The excavation process to level a site involves several steps to prepare the land for construction or landscaping purposes. Here’s an overview of how it’s typically done:
Site Assessment and Planning:
The first step is to assess the site and develop a plan for excavation. This includes determining the desired final grade and any specific requirements for the construction project.
Utility Identification and Marking:
Before excavation begins, underground utilities such as water lines, gas pipes, electrical cables, and sewer systems are identified and marked to prevent damage during digging.
Clearing and Grubbing:
Vegetation, trees, rocks, and debris are cleared from the site to create a clear working area for excavation equipment.
Topsoil Stripping:
The top layer of soil, known as topsoil, is stripped and stockpiled separately for later use. This helps preserve fertile soil for landscaping or other purposes.
Excavation and Grading:
Excavation equipment such as excavators, bulldozers, or graders is used to dig and level the site according to the planned grades. The soil is excavated to the required depth, and excess soil may be removed or redistributed on-site as needed.
Compaction:
After excavation, the soil is compacted using compactors or rollers to achieve the desired density and stability. Proper compaction is crucial for preventing settling and ensuring a solid foundation for construction.
Drainage Considerations:
Drainage features such as swales, culverts, or drainage pipes may be installed during excavation to manage water runoff and prevent erosion on the leveled site.
Quality Control and Inspection:
Throughout the excavation and grading process, quality control measures are implemented to ensure that the site is leveled accurately and meets the specified requirements. Inspections may be conducted to verify compliance with engineering standards.
Backfilling and Restoration:
Once the site is leveled and graded to satisfaction, any necessary backfilling is done to fill in excavated areas. Topsoil that was stockpiled earlier is spread over the site, and landscaping or other restoration work may be initiated.
Final Inspection and Handover:
A final inspection is carried out to confirm that the site has been properly leveled, graded, and prepared according to the project requirements. The site may then be handed over for further development or construction activities.
Overall, the excavation process to level a site requires careful planning, skilled equipment operation, and adherence to safety and environmental guidelines to achieve a successful outcome. Professional excavators or construction contractors typically manage these tasks to ensure efficiency and quality.
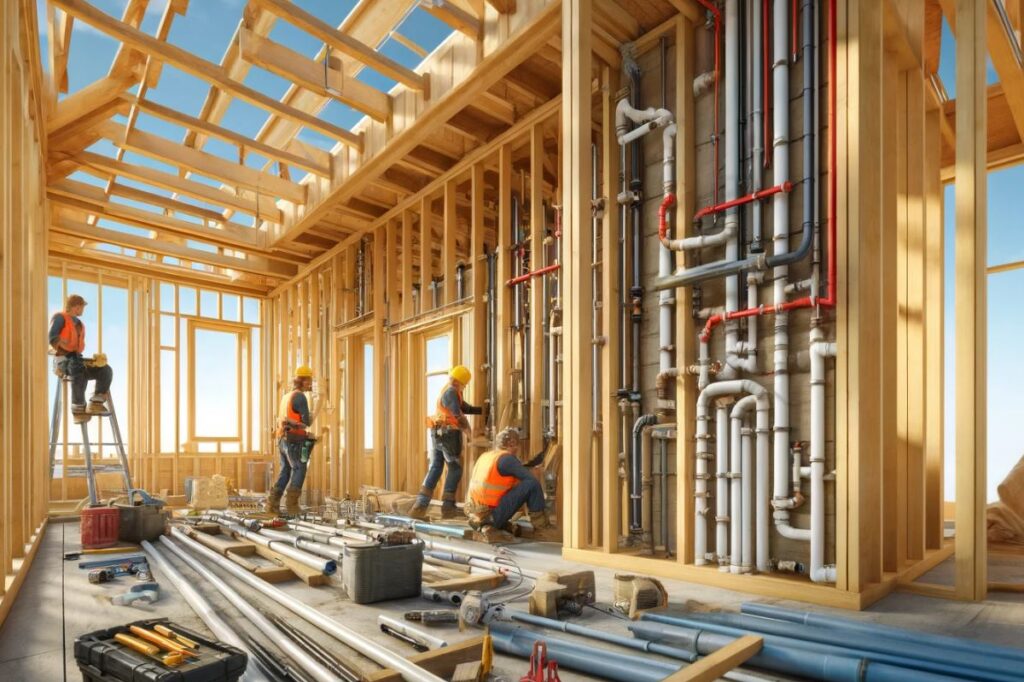
3. Underground Mechanical
Subterranean Systems: Mechanical Work Beneath Your Home
The underground mechanical process involves the installation and operation of various mechanical systems below the ground level. Here’s an overview of some common underground mechanical processes:
Utilities Installation:
Underground mechanical systems often include the installation of utilities such as water supply pipes, sewer lines, gas pipelines, and electrical conduits. These systems provide essential services to buildings and infrastructure.
Trenching and Excavation:
Trenching and excavation are conducted to create pathways for underground utilities. Excavation equipment like backhoes or trenchers is used to dig trenches of the required depth and width.
Pipe and Conduit Installation:
Pipes for water supply, sewage, gas, and conduits for electrical cables are installed in the excavated trenches. Proper alignment, grading, and joint connections are ensured during installation.
Utility Connection and Testing:
Once the pipes and conduits are installed, they are connected to the main supply lines or networks. Pressure testing, leak detection, and other checks are performed to ensure the integrity and functionality of the underground utilities.
Manhole and Access Point Installation:
Manholes, access points, and utility boxes are installed at strategic locations along the underground systems. These provide access for maintenance, inspections, and repairs in the future.
Backfilling and Compaction:
After the underground mechanical systems are installed and tested, the trenches are backfilled with suitable materials such as sand or gravel. Proper compaction is done to ensure stability and prevent settlement.
Grouting and Sealing:
Grouting may be applied around utility joints and connections to provide additional support and prevent water infiltration. Sealing materials like concrete or sealant compounds are used to protect vulnerable areas.
Monitoring and Maintenance:
Regular monitoring and maintenance of underground mechanical systems are essential to ensure they function effectively and remain in good condition over time. This includes inspections, cleaning, repairs, and upgrades as needed.
Safety Considerations:
Safety measures such as shoring, trench boxes, barricades, and signage are implemented during underground mechanical work to protect workers and prevent accidents.
Overall, the underground mechanical process involves precise planning, skilled execution, and adherence to safety standards to install and maintain essential underground utilities and systems for various applications. Professional contractors with expertise in underground construction and mechanical engineering typically manage these processes to ensure quality and compliance.

4. Foundation
Foundational Elements: Building the Base of Your Home
Slab on Grade
The process of constructing a slab-on-grade foundation involves several key steps to create a sturdy and level base for a building. Here’s an overview of the typical process:
Site Preparation:
The site is cleared of vegetation, debris, and topsoil. The ground is then leveled and compacted to provide a stable base for the foundation.
Layout and Excavation:
The layout of the foundation is marked on the prepared ground. Excavators dig trenches along the perimeter of the foundation area to accommodate the foundation walls, if applicable.
Gravel and Vapor Barrier Installation:
A layer of gravel is spread and leveled within the excavated area to improve drainage and provide a solid base. A vapor barrier, typically made of polyethylene sheeting, is then installed over the gravel to prevent moisture from seeping into the concrete slab.
Formwork Construction:
Formwork, often made of wood or metal, is erected along the edges of the foundation area to define the shape and dimensions of the concrete slab. The formwork also contains the concrete during pouring.
Rebar Placement:
Reinforcing bars (rebars) are placed within the formwork to reinforce the concrete slab. The rebars are arranged in a grid pattern and elevated using chairs or supports to ensure they are positioned in the center of the slab.
Concrete Pouring:
Once the formwork and rebar are in place, concrete is poured into the designated area. The concrete is spread evenly using tools such as screeds to achieve the desired thickness and levelness.
Finishing and Curing:
After pouring, the concrete slab is smoothed and leveled using trowels. Control joints may be cut into the surface to control cracking. The concrete is then left to cure and harden over several days, typically under controlled conditions to prevent rapid drying or moisture loss.
Edge Insulation and Waterproofing:
Insulation boards or strips may be installed along the edges of the slab to prevent heat loss and provide thermal protection. Waterproofing membranes or coatings are also applied to the exterior of the foundation walls to protect against moisture infiltration.
Backfilling and Site Grading:
Once the slab has cured, any excavated soil around the foundation is backfilled and compacted. The site is graded to ensure proper drainage away from the building.
Final Inspection:
Local building authorities may conduct a final inspection to ensure that the slab-on-grade foundation meets construction standards and codes before proceeding with further building activities.
Overall, the process of constructing a slab-on-grade foundation involves careful planning, site preparation, concrete pouring, and finishing to create a solid and durable base for the building structure. Professional contractors and engineers typically oversee and execute these steps to ensure quality and compliance with building regulations.
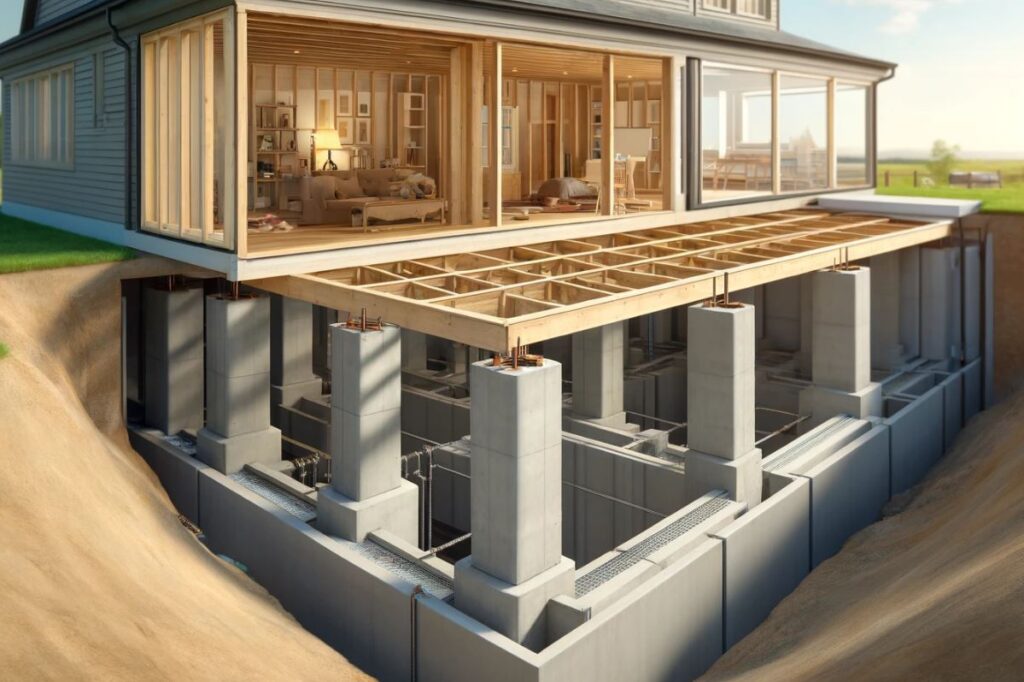
Raised Foundation
Constructing a raised foundation involves several key steps to elevate the building above ground level, providing space for utilities, insulation, and ventilation. Here’s an overview of the typical process for building a raised foundation:
Site Preparation:
The site is cleared of vegetation, debris, and topsoil. The ground is then leveled and graded to create a stable base for the raised foundation.
Layout and Excavation:
The layout of the raised foundation is marked on the prepared ground. Excavators dig trenches for footings and foundation walls, if applicable, according to the building design.
Footings Installation:
Concrete footings are poured into the excavated trenches to support the weight of the foundation walls and the structure above. The footings are reinforced with steel rebars for added strength.
Foundation Walls Construction:
Foundation walls are built on top of the footings to form the perimeter of the raised foundation. These walls can be constructed using concrete blocks, poured concrete, or precast panels. They are reinforced with rebars for structural integrity.
Backfilling and Compaction:
Once the foundation walls are in place and the concrete has cured, the excavated soil around the foundation is backfilled and compacted. This helps provide additional support and stability to the raised foundation.
Floor Framing:
Floor joists or beams are installed on top of the foundation walls to support the building’s floor structure. Subflooring may also be added at this stage to create a solid base for the finished floor.
Utilities Installation:
Plumbing, electrical wiring, and HVAC systems are installed within the raised foundation. Access points and utility connections are strategically placed for ease of maintenance and service.
Insulation and Waterproofing:
Insulation materials are installed between the floor joists and within the foundation walls to provide thermal protection and energy efficiency. Waterproofing membranes or coatings are applied to the exterior of the foundation walls to prevent moisture infiltration.
Ventilation and Access:
Vents or vents wells are installed around the raised foundation to provide airflow and prevent moisture buildup. Access doors or hatches may also be added for maintenance and inspection purposes.
Final Grading and Landscaping:
The area around the raised foundation is graded to ensure proper drainage away from the building. Landscaping elements such as retaining walls, gardens, or driveways may be added to enhance the exterior environment.
Overall, the process of constructing a raised foundation involves careful planning, excavation, concrete work, framing, utility installation, and finishing to create a stable and functional base for the building structure. Professional contractors and engineers typically oversee and execute these steps to ensure quality and compliance with building codes and regulations.
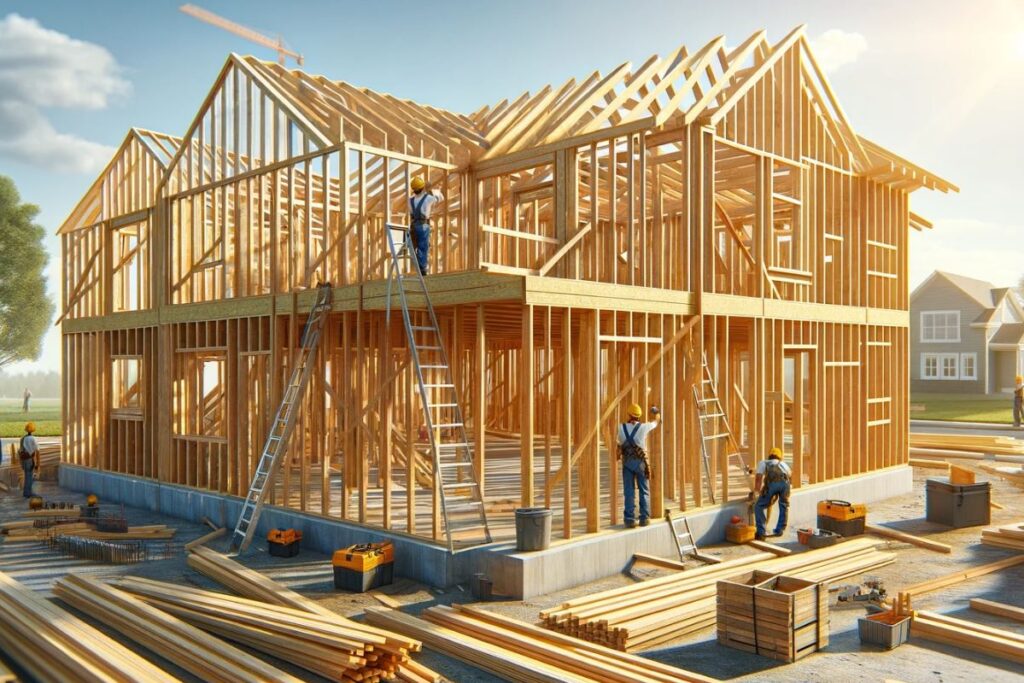
5. Framing
Structural Framing: Building the Skeleton of Your Home
The framing process of building a house involves constructing the structural framework that supports the entire structure, including walls, floors, and roof. Here’s an overview of the typical framing process:
Foundation Attachment:
Sill plates, made of treated lumber or steel, are secured to the foundation using anchor bolts or other fastening methods. These plates provide a stable base for the framing to attach to.
Wall Framing:
Exterior and interior walls are framed using studs, typically 2×4 or 2×6 lumber, spaced at regular intervals according to the building design. The studs are aligned and secured to the sill plates, top plates, and each other using nails or screws.
Window and Door Openings:
Openings for windows and doors are framed within the wall structure using headers (horizontal beams) and king studs (vertical supports). These components support the weight above the openings and provide structural integrity.
Floor Framing:
Floor joists, made of engineered wood or dimensional lumber, are installed horizontally across the foundation walls to create the framework for the floors. Rim joists and blocking are added for support and stability.
Subfloor Installation: ( For Second Story Only)
Subflooring panels, typically made of plywood or oriented strand board (OSB), are installed on top of the floor joists to create a solid base for the finished flooring materials.
Sheathing and House Wrap:
Exterior walls and roof surfaces are covered with sheathing panels (OSB or plywood) to provide lateral bracing and a base for exterior finishes. A house wrap or building paper may be applied for moisture protection and energy efficiency.
Bracing and Structural Integrity:
Bracing systems, such as diagonal braces or shear walls, are added to provide stability and resist lateral forces (e.g., wind or seismic loads). Connections are reinforced with metal hardware for structural integrity.
Inspection and Code Compliance:
Structural inspections are conducted at various stages of framing to ensure compliance with building codes and structural engineering requirements. Any necessary corrections or reinforcements are addressed before proceeding.
The framing process forms the skeleton of the house, creating the framework onto which all other building components, such as insulation, drywall, siding, and roofing, are added. It requires skilled labor, precise measurements, and adherence to building standards to ensure a safe and sturdy structure. Professional framers or contractors typically oversee and execute the framing process to achieve quality and durability in the construction of a house.
6. Roof
Roofing: Sheltering Your Home with Precision
The roof installation process is a critical step in building construction, as it provides protection from the elements and contributes to the overall structural integrity and energy efficiency of a building. Here’s an overview of the typical roof installation process:
Preparation:
Before roof installation begins, the structure’s framing is completed, including the installation of trusses, ceiling joists, sheathing, and any necessary bracing or supports.
Roof Framing:
Roof trusses or rafters, designed according to the roof pitch and design specifications, are installed to create the roof structure. Trusses are prefabricated and lifted into place, while rafters are cut and assembled on-site.
Selecting Roofing Materials:
High-quality roofing materials are selected based on factors such as climate, building design, durability, energy efficiency, and aesthetics. Common roofing materials include asphalt shingles, metal roofing, tiles, or composite materials.
Underlayment Installation:
A waterproof underlayment, such as felt paper or synthetic membrane, is installed over the roof sheathing to provide a secondary barrier against moisture infiltration.
Flashing Installation:
Flashing materials, typically made of metal or waterproof membranes, are installed around roof penetrations (e.g., vents, chimneys, skylights) and along roof edges to prevent water leaks and ensure a watertight seal.
Starter Course and Drip Edge Installation:
A starter course of roofing material is installed along the eaves and rakes of the roof to provide a base for the first row of shingles. Drip edge flashing is also installed along the edges to direct water away from the fascia and into the gutters.
Shingle Installation (or Roofing Material Installation):
Roofing materials, such as asphalt shingles, are installed according to manufacturer guidelines and best practices. Shingles are laid starting from the bottom edge of the roof and overlapping each row to shed water effectively. Other roofing materials may have different installation methods.
Ridge Vent and Ventilation Installation:
Ridge vents or other types of roof ventilation systems are installed at the peak of the roof to allow for proper air circulation and ventilation in the attic space. Ventilation is crucial for maintaining a healthy and energy-efficient roofing system.
Flashing and Trim Work:
Additional flashing and trim pieces are installed as needed around roof penetrations, valleys, and transitions to ensure waterproofing and a seamless appearance. Sealants and caulking are applied to seal joints and gaps.
Valley and Hip/Ridge Installation:
Valleys, where roof planes intersect, and hip/ridge lines, where roof slopes meet at the top, are reinforced with specialized flashing and materials to enhance durability and water shedding.
Final Inspection:
A final inspection is conducted to verify that the roof installation meets building codes, manufacturer specifications, and industry standards. Any deficiencies or corrections are addressed before completing the roof installation process.
Proper roof installation requires skilled labor, attention to detail, and adherence to manufacturer guidelines and building codes. Professional roofing contractors typically handle roof installations to ensure quality, durability, and compliance with industry standards. Regular maintenance and inspections are also recommended to extend the lifespan of the roofing system and address any potential issues promptly.
7. Window and Door installation
Installing Windows and Doors: Enhancing Your Home's Entryways
Windows and exterior doors are installed within the framed openings, secured with flashing, trim, and weatherproofing materials to ensure a tight seal and proper functioning.
Weather stripping, caulking, and insulation strips are applied around windows and doors to seal gaps and improve energy efficiency. Insulated window treatments, such as double-pane windows with low-emissivity coatings, can also enhance thermal performance.
8. HVAC
Keeping Your Home Comfortable
The HVAC (Heating, Ventilation, and Air Conditioning) process involves the design, installation, operation, and maintenance of systems that control indoor air quality, temperature, and humidity within a building. Here’s an overview of the typical HVAC process:
Assessment and Design:
Title 24 assess the building’s heating and cooling needs based on factors such as size, layout, occupancy, insulation, climate, and local codes. They design customized HVAC systems to meet these requirements efficiently.
Equipment Selection:
HVAC systems may include equipment such as furnaces, boilers, heat pumps, air conditioners, ductwork, ventilation fans, air handlers, thermostats, and control systems. The selection of equipment depends on the building’s heating and cooling loads.
Ductwork Installation:
Ductwork is installed throughout the building to distribute heated or cooled air from the HVAC equipment to different rooms and zones. Proper duct sizing, insulation, sealing, and routing are crucial for efficient airflow and energy savings.
Ventilation System Installation:
Ventilation systems are installed to introduce fresh outdoor air and remove indoor air pollutants, odors, and moisture. This includes exhaust fans, supply vents, return air vents, and air exchange systems like heat recovery ventilators (HRVs) or energy recovery ventilators (ERVs).
Heat Source Installation:
Heating equipment, such as furnaces, boilers, or heat pumps, is installed to provide warmth during cold weather. The heat source may use electricity, natural gas, propane, oil, or renewable energy sources.
Cooling System Installation:
Cooling equipment, such as air conditioners or heat pumps, is installed to provide cooling during hot weather. The cooling system may use refrigerants and compressor technology to remove heat from indoor air.
Air Distribution and Balancing:
Once the HVAC equipment is installed, air distribution is balanced to ensure even airflow and consistent temperature throughout the building. Dampers, registers, grilles, and diffusers are adjusted as needed to optimize air distribution.
Thermostat and Controls Installation:
Thermostats and control systems are installed to regulate indoor temperatures, humidity levels, fan speeds, and system operation. Programmable thermostats or smart thermostats may be used for energy-saving scheduling and remote control.
Testing and Commissioning:
HVAC systems are tested and commissioned to verify proper operation, efficiency, safety, and compliance with design specifications and building codes. Adjustments and fine-tuning are made as needed to optimize performance.
Training and Maintenance:
Building occupants and maintenance staff are trained on how to operate and maintain the HVAC system effectively. Regular maintenance, including filter changes, cleaning, inspections, and tune-ups, is essential to ensure efficient and reliable HVAC operation.
The HVAC process is a comprehensive and multi-step endeavor that requires coordination between HVAC professionals, architects, engineers, contractors, and building owners. Proper design, installation, operation, and maintenance of HVAC systems are critical for indoor comfort, energy efficiency, indoor air quality, and building sustainability. Professional HVAC contractors and technicians typically manage the HVAC process to ensure quality, safety, and compliance with industry standards.
9. Electrical
Powering Your Home: Exploring Electrical Systems
The electrical process in building construction involves the design, installation, and maintenance of electrical systems to power various components and devices within a building. Here’s an overview of the typical electrical process:
Electrical Design:
Electrical engineers or designers create a comprehensive electrical plan based on the building’s layout, occupancy, power requirements, safety codes, and energy efficiency goals. This includes the placement of outlets, switches, lighting fixtures, circuits, and electrical panels.
Wiring Installation:
Electricians install wiring systems to distribute electricity throughout the building. This includes running cables or conduits from the electrical panel to outlets, switches, light fixtures, appliances, HVAC equipment, and other electrical devices.
Electrical Panel Installation:
Electrical panels, also known as breaker panels or distribution boards, are installed to house circuit breakers, fuses, and electrical connections. Panels are sized and configured based on the building’s electrical load requirements.
Outlet and Switch Installation:
Outlets (receptacles) and switches are installed at strategic locations according to the electrical plan. Outlets provide power for appliances, electronics, and devices, while switches control lighting, fans, and other electrical fixtures.
Lighting Installation:
Lighting fixtures, such as recessed lights, pendant lights, chandeliers, track lights, and wall sconces, are installed throughout the building. Energy-efficient lighting options, such as LED fixtures, may be used to reduce electricity consumption.
Appliance and Equipment Wiring:
Wiring is installed to connect major appliances, HVAC systems, water heaters, generators, and other electrical equipment to the electrical system. Specialized wiring may be required for high-power equipment or systems.
Safety Systems Installation:
Safety systems, such as smoke detectors, carbon monoxide detectors, fire alarms, emergency lighting, and ground fault circuit interrupters (GFCIs), are installed to enhance occupant safety and comply with building codes.
Testing and Commissioning:
Once the electrical system is installed, electricians conduct thorough testing and commissioning to ensure proper functionality, voltage levels, grounding, insulation resistance, and electrical safety. Any issues or deficiencies are addressed and corrected.
Final Inspection and Certification:
A final inspection is conducted by electrical inspectors to verify that the electrical work meets regulatory standards and safety requirements. Upon approval, the electrical system is certified as compliant and ready for use.
The electrical process in building construction is complex and requires skilled electricians, designers, engineers, and inspectors to ensure safe and reliable electrical systems. Professional electrical contractors typically manage the electrical process from design to completion, following industry standards, codes, and best practices to deliver quality and compliant electrical installations.
10. Plumbing
Piping Perfection: The Ins and Outs of Plumbing Systems
The plumbing process in building construction involves designing, installing, and maintaining plumbing systems to ensure the safe and efficient delivery of water, gas, and sewage within a building. Here’s an overview of the typical plumbing process:
Plumbing Design:
Contractors and plumbers collaborate to map out the positioning of new water pipes and drainage systems, adhering closely to local plumbing regulations throughout the process.
Water Supply Installation:
Water supply lines are installed to bring clean water into the building from the municipal water supply or private well. Pipes, typically made of copper, PEX, CPVC, or PVC, are routed to plumbing fixtures such as sinks, showers, toilets, faucets, and water heaters.
Rough Installation:
Plumbers strategically plan the layout of piping for toilets, sinks, showers, and other fixtures during the rough plumbing stage, ensuring efficient drainage throughout the system.
Drainage and Ventilation Installation:
Drainage pipes, usually made of PVC or ABS, are installed to carry wastewater and sewage away from fixtures to the main sewer line or septic system. Ventilation pipes, such as vent stacks or vent pipes, are installed to prevent sewer gases from building up and to allow air to enter the drainage system for proper flow.
Gas Supply Installation:
Gas pipes, typically made of black iron or flexible CSST (corrugated stainless steel tubing), are installed to supply natural gas or propane to gas-powered appliances such as stoves, furnaces, water heaters, and fireplaces. Gas lines are carefully sized, routed, and connected with gas shut-off valves for safety.
Backflow Prevention and Pressure Regulation:
Backflow prevention devices, such as backflow preventers and check valves, are installed to prevent contaminated water from flowing back into the public water supply. Pressure regulators are used to control water pressure and prevent damage to plumbing fixtures and appliances.
Testing and Commissioning:
Once the plumbing system is installed, plumbers conduct testing and commissioning to check for leaks, proper flow rates, drainage performance, water pressure, and gas line integrity. Any issues or deficiencies are addressed and corrected.
Final Inspection and Certification:
A final inspection is conducted by plumbing inspectors to verify that the plumbing work meets regulatory standards and safety requirements. Upon approval, the plumbing system is certified as compliant and ready for use.
Documentation and Maintenance:
Comprehensive documentation, including plumbing diagrams, pipe schedules, fixture specifications, and maintenance records, is prepared and provided to building owners or operators. Regular maintenance, inspections, and repairs are essential for ongoing plumbing system performance and safety.
The plumbing process in building construction is complex and requires skilled plumbers, designers, engineers, and inspectors to ensure the reliable and safe operation of plumbing systems. Professional plumbing contractors typically manage the plumbing process from design to completion, following industry standards, codes, and best practices to deliver quality and compliant plumbing installations.
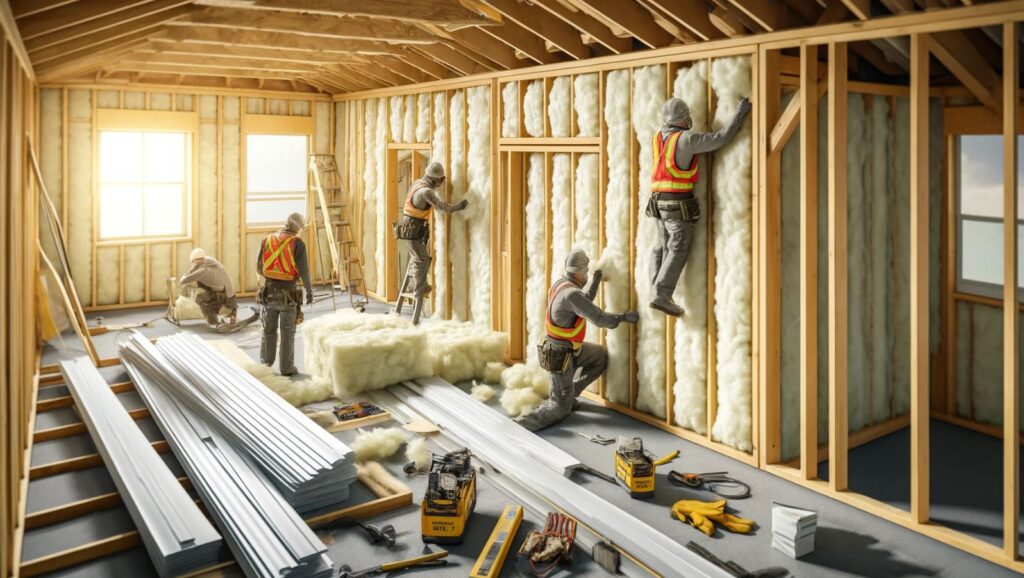
11. Insulation
Insulating for Comfort: Understanding Home Insulation
The insulation process in building construction involves installing materials to reduce heat transfer, maintain indoor comfort, improve energy efficiency, and control moisture levels within a building. Here’s an overview of the typical insulation process:
Assessment and Planning:
Title-24 assess insulation requirements based on factors such as climate, building type, energy efficiency goals, local building codes, and budget constraints. They develop an insulation plan that specifies the type, location, and thickness of insulation materials to be used.
Selecting Insulation Materials:
Various insulation materials are available, including fiberglass, foam board, cellulose, spray foam, mineral wool, and reflective barriers. The selection of insulation materials depends on factors such as R-value (thermal resistance), moisture resistance, fire safety, environmental impact, and installation method.
Wall Insulation Installation:
Insulation materials are installed within wall cavities during the framing phase of construction. For existing buildings or retrofit projects, insulation can be installed through injection, blown-in, or foam spray methods. Insulation boards may also be installed on exterior walls as continuous insulation.
Attic Insulation Installation:
Insulation is added to the attic floor, roof rafters, or attic ceiling to prevent heat loss in winter and heat gain in summer. Common attic insulation materials include fiberglass batts, blown-in cellulose or fiberglass, and spray foam insulation.
Floor Insulation Installation:
Insulation is installed beneath floors to provide thermal comfort, reduce heat transfer between levels, and control moisture. Floor insulation materials may include rigid foam boards, spray foam, or fiberglass batts depending on the construction type.
Crawl Space and Basement Insulation:
Crawl spaces and basements are insulated to prevent cold air infiltration, moisture issues, and heat loss through the foundation. Insulation materials such as foam board, spray foam, or rigid insulation panels are installed on crawl space walls or basement walls.
Air Sealing and Vapor Barrier Installation:
Air sealing measures, such as caulking, weather stripping, and sealing penetrations, are implemented to minimize air leaks and improve insulation performance. Vapor barriers or vapor retarders may also be installed to control moisture diffusion and prevent condensation.
Ductwork Insulation:
HVAC ducts are insulated to reduce energy losses and maintain consistent indoor temperatures. Duct insulation materials, such as fiberglass wraps, foam insulation sleeves, or rigid boards, are installed around ducts in unconditioned spaces like attics or crawl spaces.
Testing and Verification:
After insulation installation, builders may conduct thermal imaging tests, blower door tests, or energy audits to assess insulation effectiveness, air tightness, and overall building performance. Any deficiencies or areas needing improvement are identified and addressed.
Proper insulation is essential for creating a comfortable, energy-efficient, and durable building envelope. Professional insulation contractors typically manage the insulation process, ensuring quality installation, code compliance, and optimal thermal performance for buildings of all types and sizes.
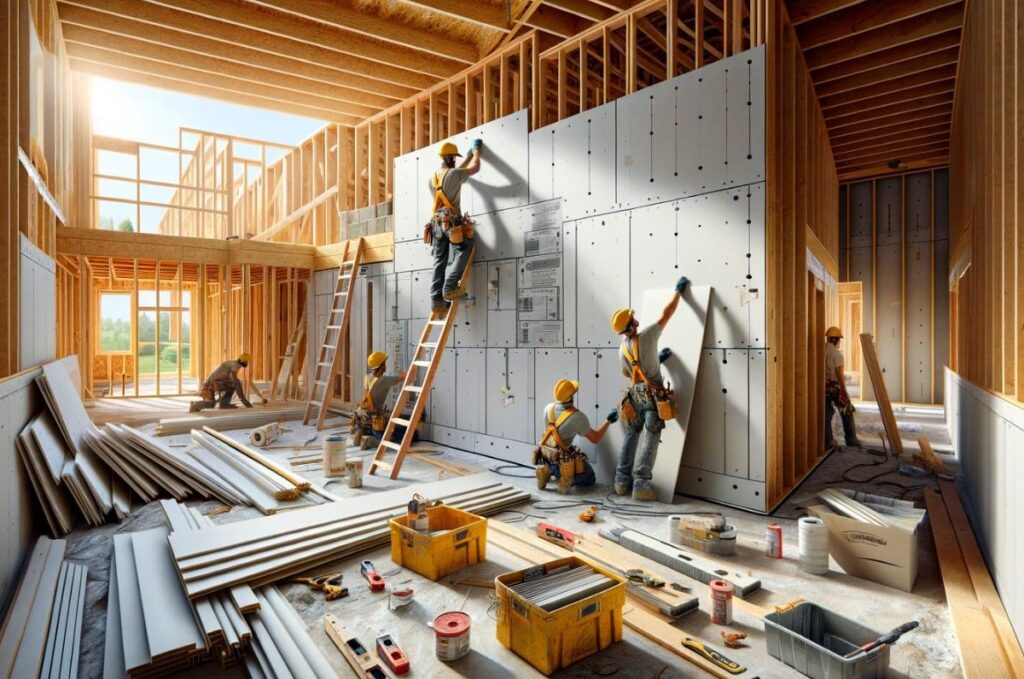
12. Drywall
Seamless Surfaces: The Craft of Drywall Application
The drywall process, also known as gypsum board installation or wallboard installation, involves the installation of panels made of gypsum plaster sandwiched between layers of paper or fiberglass. Drywall is a key component in building construction, used to create interior walls and ceilings. Here’s an overview of the typical drywall process:
Preparation:
Before drywall installation begins, the building’s framing is completed, including wall studs, ceiling joists, and support structures. Electrical wiring, plumbing, insulation, and HVAC components are typically installed before drywall.
Measuring and Cutting:
Drywall panels are measured and cut to fit the dimensions of the walls and ceilings. Specialized tools, such as a drywall T-square and utility knife, are used to achieve accurate cuts.
Hanging Drywall:
Drywall panels are lifted and attached to the framing using drywall screws or nails. The panels are installed horizontally or vertically, starting from one corner and working across the wall or ceiling.
Securing Joints and Edges:
Drywall joints between panels are secured using joint tape and joint compound (also known as mud). Paper or fiberglass mesh tape is applied over the joints, and joint compound is spread over the tape to create a smooth, seamless finish. Drywall corners may also be reinforced with metal or plastic corner beads.
Sanding and Smoothing:
Once the joint compound is dry, the surface is sanded to remove imperfections, smooth out seams, and create a level surface. Sanding is typically done with a drywall sanding block or pole sander.
Proper drywall installation is crucial for several reasons. First, it provides a smooth and uniform surface for painting or wallpapering, enhancing the aesthetics of your interior spaces. Second, drywall serves as a barrier against moisture, helping to prevent mold and mildew growth. Additionally, it improves the acoustic insulation of your home, reducing noise transmission between rooms.
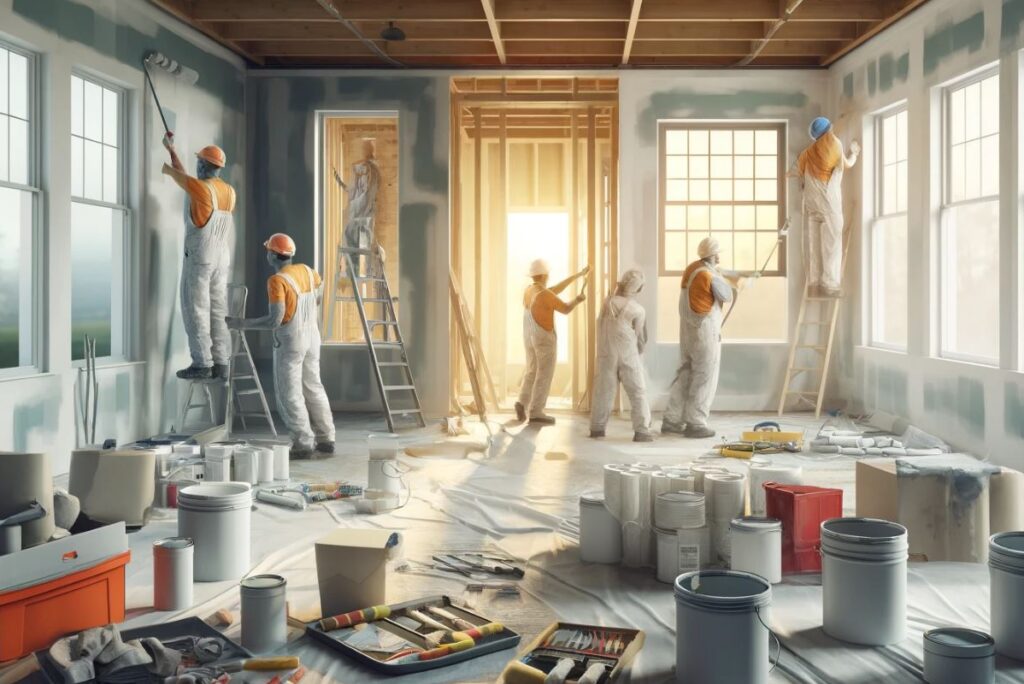
13. Painting
Applying a Fresh Coat: The Art of Interior Finishing
Professional home painting involves a high level of expertise and skill. Professionals use quality paints and tools, apply multiple coats for even coverage, and pay attention to detail, such as cutting-in edges and applying trim neatly. Their experience allows them to work efficiently while achieving professional-grade results that enhance the appearance and durability of your home’s surfaces. Here’s an overview of the typical painting process:
Priming and Painting:
After sanding, the drywall surface is primed to seal the porous gypsum and improve paint adhesion. Primer is applied using a paint roller or sprayer. Once the primer is dry, the drywall is painted with the desired color and finish.
Texture Application (Optional):
Some buildings may require textured drywall surfaces for aesthetic or functional reasons. Texture can be applied using various methods, such as spraying, rolling, or hand troweling, to achieve different textures like smooth, orange peel, knockdown, or popcorn.
Trim and Finish Work:
Trim pieces, such as baseboards, crown molding, and door/window casings, are installed around the edges of the drywall to create a finished look. Gaps between drywall and trim are filled with caulk or joint compound and painted to match.
Final Inspection:
A final inspection may be conducted to check for quality, finish consistency, paint coverage, and adherence to building codes. Any touch-ups or corrections are made before completing the drywall process.
Experienced painters or skilled artisans usually manage the painting process to guarantee top-notch work, seamless finishes, and a polished look. Painting, a versatile and budget-friendly construction material, finds widespread use in residential, commercial, and industrial building projects.
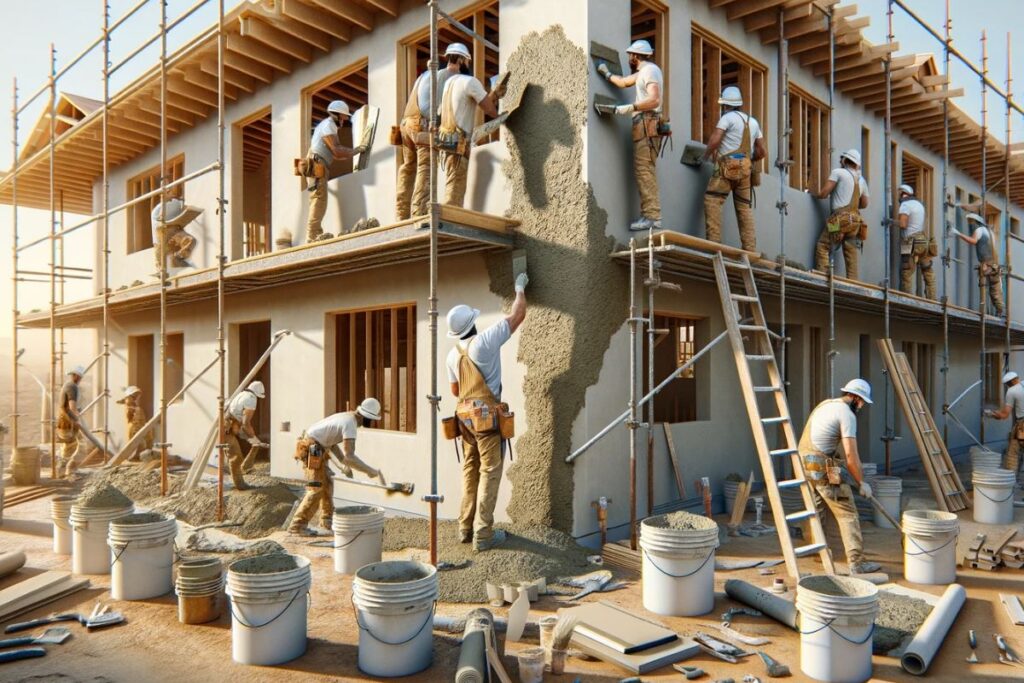
14. Stucco
Rendering a Surface: Exploring Stucco Application
The stucco process, also known as exterior plastering or rendering, involves the application of a cementitious material to the exterior surfaces of buildings to create a durable, weather-resistant finish. Here’s an overview of the typical stucco process:
Surface Preparation:
The surface to be stuccoed is prepared by cleaning and repairing any damage, such as cracks or holes. Loose paint, dirt, debris, and contaminants are removed to ensure a clean and smooth substrate.
Installation of Flashing and Moisture Barriers:
Flashing, such as metal or synthetic materials, is installed around windows, doors, and other openings to prevent water infiltration. A moisture barrier, typically a building paper or synthetic membrane, is applied over the substrate to further protect against moisture penetration.
Wire Mesh Installation (optional):
A wire mesh or metal lath may be installed over the moisture barrier to provide a keying surface for the stucco and improve adhesion. The mesh is attached securely to the substrate using fasteners.
Mixing Stucco Materials:
Stucco is a mixture of Portland cement, sand, water, and additives. The stucco materials are mixed thoroughly to achieve the desired consistency and workability. Pigments or colorants may also be added to create custom stucco colors.
Applying Scratch Coat:
The first layer of stucco, known as the scratch coat, is applied to the prepared substrate using a trowel. The stucco is pressed firmly into the wire mesh or lath and scratched with a comb-like tool to create a rough surface for better adhesion of the next coat.
Applying Brown Coat:
The second layer of stucco, called the brown coat, is applied over the scratch coat once it has cured sufficiently. The brown coat is leveled and smoothed using trowels to create a flat and even surface. This coat provides additional thickness and strength to the stucco system.
Applying Finish Coat:
The final layer of stucco, known as the finish coat, is applied once the brown coat has set but is still slightly damp. The finish coat can be textured or smoothed depending on the desired appearance. Various finishing techniques, such as sponge float, dash, or trowel finish, are used to achieve different textures and patterns.
Curing and Drying:
After the stucco is applied, it is allowed to cure and dry completely. Curing times vary depending on weather conditions, humidity levels, and stucco thickness. Proper curing is essential for stucco strength, durability, and adhesion.
Painting or Sealing (optional):
Once the stucco has fully cured, it can be painted with exterior-grade paint to enhance appearance and provide additional protection. Alternatively, a clear sealer or protective coating may be applied to seal the stucco and improve weather resistance.
Final Inspection:
A final inspection may be conducted to check the quality of the stucco application, finish consistency, texture uniformity, and adherence to building codes and standards. Any touch-ups or corrections are made as needed.
Professional stucco contractors or skilled tradespeople typically handle the stucco process to ensure proper installation, durability, and aesthetic appeal. Stucco is a popular exterior finish for residential, commercial, and institutional buildings due to its versatility, durability, and low maintenance requirements.
In addition to stucco, there are several other types of siding materials that can be used to finish the exterior surfaces of buildings. Some common siding options include:
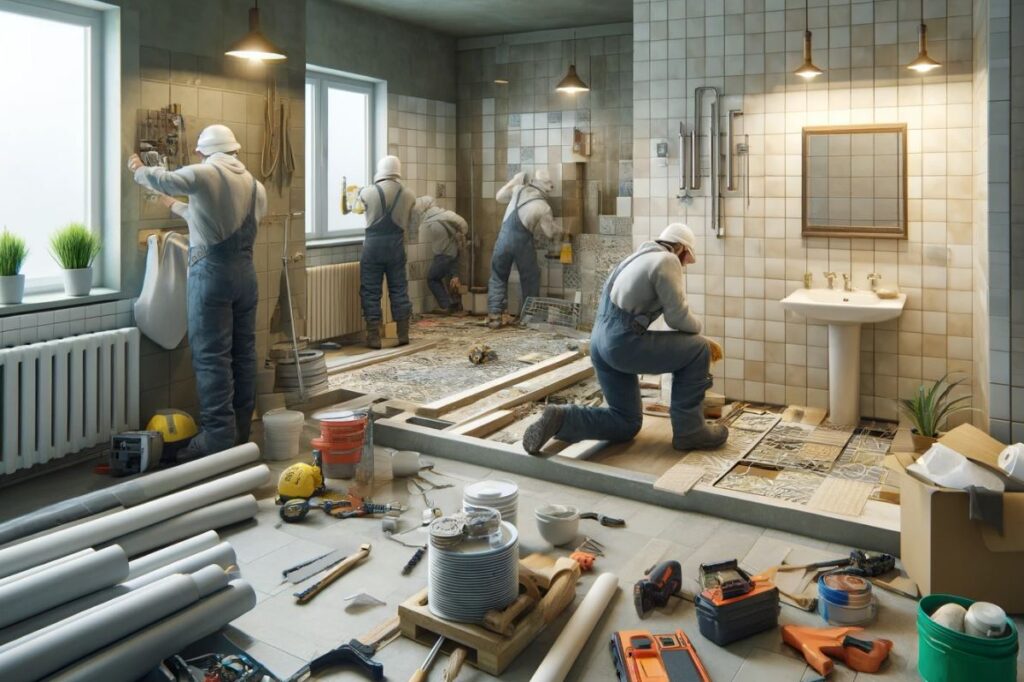
15. Bathrooms
Crafting Tranquil and Functional Bathing Spaces
The bathroom construction process involves several key steps to create a functional and aesthetically pleasing space. Here’s an overview of the typical bathroom construction process:
Planning and Design:
The first step is to plan and design the bathroom layout based on the available space, plumbing fixtures, electrical requirements, ventilation, and user preferences. This includes selecting the location of the shower, bathtub, toilet, sink, cabinets, and other elements. This process is done with your Architect or Designer.
Demolition and Preparation:
If renovating an existing bathroom, demolition is done to remove old fixtures, flooring, walls, and plumbing. The space is then prepared by addressing any structural issues, repairing or updating plumbing and electrical systems, and installing necessary framing or supports.
Flooring Installation:
Once the rough-in work is completed and inspected, the flooring is installed. Common bathroom flooring options include ceramic tiles, porcelain tiles, vinyl, laminate, or natural stone. The flooring is leveled and grouted as needed for a smooth and waterproof surface.
Wall Installation:
Walls are constructed or prepared for installation of wall materials. This may involve drywall installation, waterproof backer board installation (for wet areas like showers and tub surrounds), or other wall materials such as tile, beadboard, or wainscoting.
Cabinet and Vanity Installation:
Cabinets, vanities, and storage units are installed, including countertops, sinks, faucets, and hardware. Plumbing connections for the sink and faucet are made, and fixtures are secured in place.
Shower or Bathtub Installation:
Showers or bathtubs are installed according to the design plan. This includes setting the base or tub, installing wall surrounds or tiles, and connecting plumbing fixtures such as showerheads, faucets, and drains.
Toilet Installation:
The toilet is installed, including connecting the water supply line, securing the toilet to the floor, and installing the tank components. Proper sealing and caulking are applied around the base of the toilet.
Lighting and Ventilation:
Lighting fixtures, such as overhead lights, vanity lights, and recessed lights, are installed to provide adequate illumination. Ventilation is addressed by installing exhaust fans or ventilation systems to remove moisture and odors.
Finishing Touches:
Final finishes are applied, including painting walls, trim, and ceilings. Caulking and sealing are done around fixtures, joints, and edges for waterproofing and a clean finish. Mirrors, towel bars, shelves, and other accessories are installed.
Cleanup and Completion:
The bathroom is cleaned, and any construction debris is removed. Final touches such as grout sealing, hardware adjustments, and touch-up painting are done. The bathroom is ready for use and enjoyment by the occupants.
Professional contractors, plumbers, electricians, and designers typically oversee and coordinate the bathroom construction process to ensure quality workmanship, adherence to building codes, and customer satisfaction. Each phase of the process is carefully planned and executed to create a functional, stylish, and comfortable bathroom space.
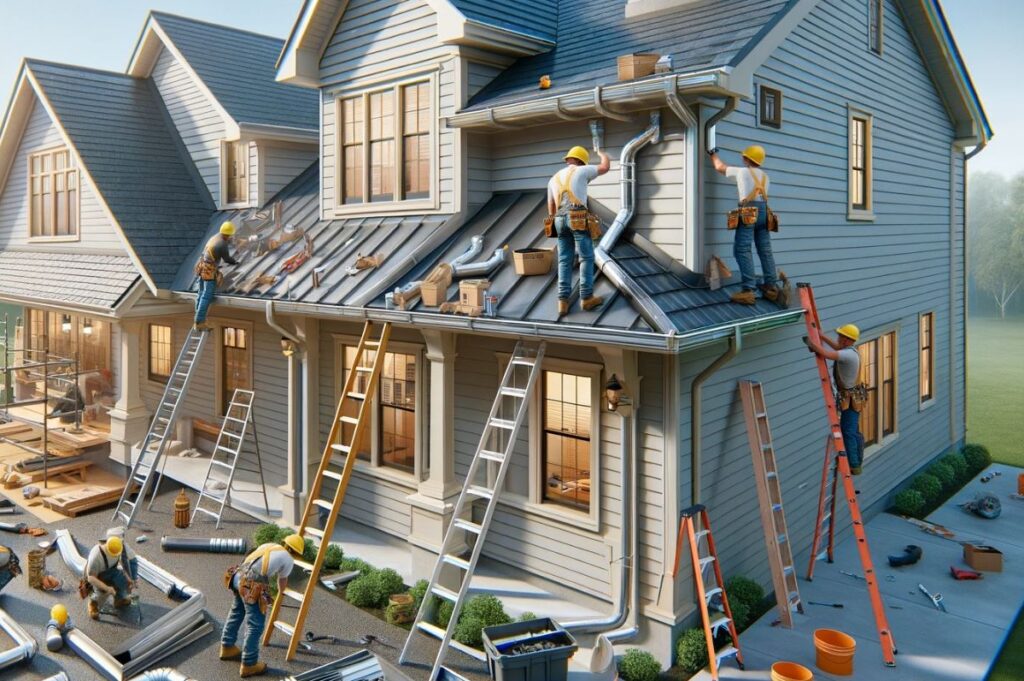
16. Gutters
Rainwater Management Systems: Enhancing Water Drainage
The gutter and downspout process involves the installation of a system that collects rainwater from the roof and directs it away from the building’s foundation. Here’s an overview of the typical gutter and downspout installation process:
Assessment and Planning:
The first step is to assess the building’s roof layout, drainage requirements, and potential water runoff areas. A plan is developed to determine the placement and size of gutters, downspouts, and accessories based on the roof pitch, surface area, and local climate conditions.
Material Selection:
Gutters and downspouts are available in various materials such as aluminum, steel, vinyl, copper, and galvanized metal. The choice of material depends on factors like durability, aesthetics, budget, and maintenance requirements.
Measurement and Cutting:
Gutters and downspouts are measured and cut to the appropriate lengths to fit the roofline and building dimensions. Specialized tools, such as a gutter cutter or saw, may be used to achieve accurate cuts.
Installation of Gutters:
Gutters are attached to the roof edge using gutter hangers, brackets, or spikes. They are positioned with a slight slope toward the downspouts to ensure proper water flow. End caps, corner pieces, and gutter guards may be installed as needed for a finished look and debris protection.
Installation of Downspouts:
Downspouts are installed vertically along the exterior walls to carry rainwater from the gutters down to the ground level or drainage system. They are secured with straps or brackets and connected to the gutter outlets with elbows or connectors.
Alignment and Sealing:
Gutters and downspouts are aligned and sealed at joints, seams, and connections to prevent leaks and water seepage. Sealant or caulking may be applied as necessary for a watertight seal.
Testing and Adjustments:
The gutter and downspout system is tested by running water through it to check for proper flow, drainage, and alignment. Any adjustments or corrections are made to ensure optimal performance and water diversion away from the building.
Optional Rain Barrel Installation:
In some cities, when performing work that exceeds a certain area, such as 500 square feet, a rain barrel may be required as part of Low Impact Development (LID) guidelines. A rain barrel collects rainwater from gutters and downspouts, providing a source of water for landscaping irrigation and reducing stormwater runoff.
Cleanup and Maintenance:
Once the gutter and downspout installataion is complete, any construction debris is removed, and the area is cleaned. Regular maintenance, such as cleaning gutters of leaves and debris, inspecting for damage, and ensuring proper drainage, is recommended to keep the system functioning effectively.
Professional gutter and downspout installers typically handle the process to ensure proper sizing, placement, alignment, and functionality of the system. Compliance with local building codes, zoning regulations, and LID guidelines, including rain barrel requirements, is essential when installing gutter and downspout systems in different cities and jurisdictions.
17. Flooring
Flooring Innovation: Enhancing Interior Spaces
The flooring process involves installing materials to create a durable, attractive, and functional surface for interior spaces. Here’s an overview of the flooring process and some common options:
Assessment and Planning:
The first step is to assess the space and determine the flooring requirements based on factors such as traffic levels, moisture resistance, aesthetic preferences, budget, and maintenance considerations. A flooring plan is developed to outline the layout, material choices, and installation details.
Subfloor Preparation:
The subfloor, which is the structural surface beneath the flooring material, is prepared by leveling, cleaning, and repairing any damage or imperfections. This may involve installing a moisture barrier, underlayment, or soundproofing material depending on the flooring type.
Flooring Material Selection:
There are several options for flooring materials, each with its characteristics, advantages, and installation methods. Common flooring options include:
Tile Flooring: Tile flooring includes ceramic, porcelain, natural stone (such as marble or granite), and mosaic tiles. Tiles are durable, moisture-resistant, and available in various colors, patterns, and finishes. Installation involves laying tiles with adhesive or mortar, grouting, and sealing for protection.
Hardwood Flooring: Hardwood flooring is made of solid wood or engineered wood planks. It offers a classic, warm, and natural look with options like oak, maple, cherry, and walnut. Hardwood floors can be sanded, stained, and finished for customization. Installation methods include nail-down, glue-down, or floating installations.
Laminate Flooring: Laminate flooring is a synthetic material that mimics the look of hardwood, tile, or stone. It is cost-effective, durable, and easy to maintain. Laminate planks or tiles are installed with a click-lock or glue-down system over an underlayment.
Vinyl Flooring: Vinyl flooring comes in sheets, tiles, or planks and offers versatility, water resistance, and affordability. It can mimic the look of hardwood, tile, or stone with various colors and patterns. Installation methods include glue-down, peel-and-stick, or floating installations.
Carpet Flooring: Carpet flooring provides warmth, comfort, and sound absorption. It comes in a range of textures, colors, and pile heights. Carpet is installed by stretching and securing it over padding or using adhesive for carpet tiles.
LVT (Luxury Vinyl Tile) and LVP (Luxury Vinyl Plank): LVT and LVP are premium vinyl flooring options that offer realistic wood or tile looks with enhanced durability, waterproof properties, and easy maintenance. They are installed similarly to standard vinyl flooring.
Concrete Flooring: Concrete flooring offers a modern, industrial aesthetic with options for staining, polishing, or stamping. It is durable, easy to clean, and suitable for both indoor and outdoor applications. Concrete floors can be poured in place or installed as precast tiles or overlays.
Installation and Finishing:
Once the flooring material is selected, it is installed according to manufacturer guidelines and industry standards. This involves cutting, fitting, adhering, or fastening the flooring material to the subfloor. For tile and hardwood flooring, grouting, sealing, sanding, staining, and finishing may be required for a polished look and added protection.
Trim and Transition Installation:
Baseboards, shoe molding, thresholds, and transition strips are installed along the edges and transitions between different flooring types or rooms. These trim pieces provide a finished appearance and cover expansion gaps.
Cleaning and Maintenance:
After installation, the flooring is cleaned, and any debris or residue is removed. Regular maintenance, such as sweeping, vacuuming, mopping, and spot cleaning, is recommended to keep the flooring looking its best. Specific care and maintenance instructions vary depending on the flooring material.
Professional flooring installers or contractors typically handle the flooring process, ensuring proper preparation, installation techniques, and finishing touches for a high-quality result. The choice of flooring material depends on factors such as design preferences, durability requirements, budget constraints, and maintenance preferences. Consulting with flooring experts can help determine the best flooring option for each space based on specific needs and considerations.

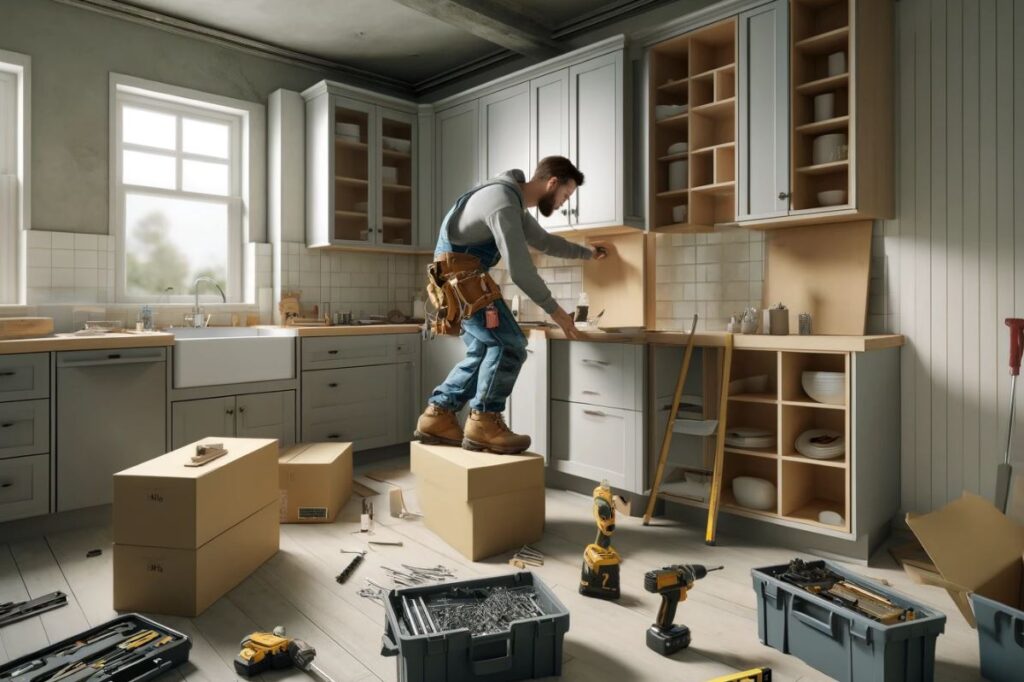
18. Cabinets
Cabinet Craftsmanship: Elevating Storage Solutions
The cabinet installation process involves designing, constructing, and installing cabinets to provide storage, organization, and aesthetics in residential or commercial spaces. Here’s an overview of the typical cabinet process:
Design and Planning:
The first step is to design the cabinets based on the available space, functionality requirements, style preferences, and budget considerations. A professional designer or cabinet maker can create detailed plans, including cabinet dimensions, layout, materials, finishes, hardware, and accessories.
Material Selection:
Cabinets can be constructed from various materials such as wood, plywood, particleboard, MDF (medium-density fiberboard), metal, or plastic. The choice of material depends on factors like durability, aesthetics, cost, and maintenance requirements.
Construction and Assembly:
Once the design is finalized, cabinets are constructed and assembled in a workshop or manufacturing facility. Skilled cabinetmakers or carpenters use precision tools and techniques to cut, shape, join, and finish cabinet components such as doors, drawers, shelves, frames, and panels.
Finishing and Customization:
Cabinets are finished with paint, stain, varnish, or laminate to enhance appearance, protect surfaces, and match the desired style or color scheme. Customizations such as decorative molding, glass inserts, hardware (handles, knobs, hinges), and interior organizers (shelving systems, drawer dividers) can be added to meet specific needs and preferences.
Installation Preparation:
Before installation, the space is prepared by ensuring proper measurements, leveling surfaces, and addressing any structural or electrical considerations. Existing cabinets or fixtures may need to be removed or modified as part of the preparation process.
Cabinet Installation:
Cabinets are installed according to the design plan and layout. This involves attaching cabinets securely to wall studs or support structures, leveling and aligning cabinets for a seamless fit, and making any necessary adjustments for doors, drawers, and hardware operation.
Final Adjustments and Hardware Installation:
Once cabinets and countertops are in place, final adjustments are made to ensure doors and drawers operate smoothly, shelves are level, and hardware is properly installed. Cabinet hardware, such as handles, knobs, hinges, and drawer slides, is attached securely and adjusted as needed.
Cleanup and Inspection:
After installation, the workspace is cleaned, and any construction debris or packaging materials are removed. A final inspection is conducted to check cabinet alignment, functionality, and overall quality. Any touch-ups or adjustments are made to achieve a finished look.
Professional cabinet makers, carpenters, or contractors typically handle the cabinet process, from design and construction to installation and finishing. Custom cabinets are tailored to fit specific spaces and design requirements, offering personalized storage solutions and enhancing the overall aesthetics of interior spaces. Working with experienced professionals ensures quality craftsmanship, attention to detail, and a functional, stylish result.
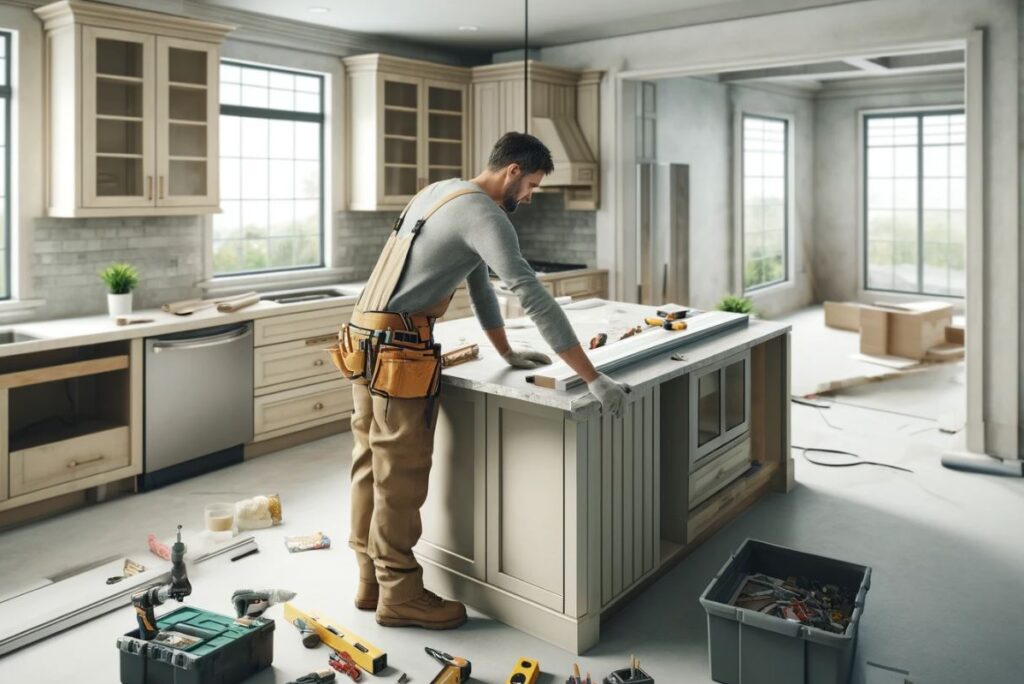
19. Countertops
Countertop Elegance: Redefining Kitchen and Bathroom Surfaces
The countertop installation process involves selecting, preparing, and installing materials to create durable and functional surfaces in kitchens, bathrooms, and other areas. Here’s an overview of the typical countertop process:
Material Selection:
The first step is to choose the countertop material based on factors such as durability, aesthetics, maintenance requirements, budget, and intended use. Common countertop materials include granite, quartz, marble, laminate, concrete, solid surface, butcher block, and stainless steel.
Measurement and Templating:
Accurate measurements of the countertop area are taken to ensure a precise fit. Templating involves creating templates or patterns of the countertop layout, including sink cutouts, edge profiles, backsplashes, and any other custom features.
Material Preparation:
Depending on the chosen material, countertop slabs or sheets are cut, shaped, and finished to the desired specifications. This may involve cutting with diamond saws, polishing edges, drilling holes for sinks and fixtures, and applying sealants or coatings for protection.
Substrate Preparation:
The underlying surface, known as the substrate, is prepared for countertop installation. This may involve leveling, reinforcing, or adding support structures as needed. For existing countertops, removal of old materials and preparation of the substrate may be required.
Countertop Installation:
Countertops are installed according to the templated layout and design. This involves placing the countertop sections or slabs on the substrate, securing them with adhesive or fasteners, and ensuring a tight fit and proper alignment. Sink cutouts are made, and sinks are installed and sealed.
Seaming and Edge Treatment:
If multiple countertop sections are used or if seams are required, seaming is done to join the sections seamlessly. Special adhesives and techniques are used to create inconspicuous seams. Edge profiles, such as bullnose, bevel, ogee, or square, are shaped and finished to achieve the desired look.
Backsplash Installation (Optional):
Backsplashes are installed along the wall behind the countertop to protect against water splashes and add aesthetic appeal. Backsplash materials may match the countertop or complement it with tiles, stone, glass, or other materials.
Sealing and Finishing:
After installation, the countertop is sealed, coated, or finished to enhance durability, stain resistance, and ease of maintenance. Sealants and coatings vary depending on the countertop material and manufacturer recommendations.
Final Cleanup and Inspection:
The countertop area is cleaned, and any excess adhesive, sealant, or debris is removed. A final inspection is conducted to ensure proper installation, alignment, sealing, and functionality. Any touch-ups or adjustments are made as needed.
Care and Maintenance Instructions:
Homeowners are provided with care and maintenance instructions specific to the countertop material. This includes cleaning methods, recommended sealants or cleaners, and tips for preserving the appearance and longevity of the countertop.
Professional countertop installers or contractors typically handle the countertop process, ensuring quality installation, precise measurements, and attention to detail. Custom countertops are tailored to fit specific spaces, design preferences, and functional requirements, providing durable and stylish surfaces for cooking, dining, and daily use.
20. Appliances
Efficient Appliances: Streamlining Your Home for Modern Living
The installation of appliances involves setting up and connecting various household appliances to ensure they function safely and effectively. Here’s an overview of the typical appliance installation process:
Delivery and Inspection:
Appliances are delivered to the installation site, and a visual inspection is conducted to check for any damages or defects. It’s essential to inspect appliances thoroughly before installation to address any issues promptly.
Location Planning:
Determine the optimal location for each appliance based on factors such as available space, utility connections (electrical, gas, water, ventilation), and accessibility for maintenance and repairs.
Electrical and Plumbing Preparation:
Ensure that electrical outlets, wiring, and plumbing connections are in place and meet the requirements for each appliance. This may involve hiring licensed electricians or plumbers to install or modify connections as needed.
Leveling and Placement:
Position appliances in their designated locations, ensuring they are level and stable. Use leveling feet or adjustments to align appliances properly, especially for refrigerators, dishwashers, and washing machines.
Connection to Utilities:
Connect appliances to electrical power, gas lines (if applicable), water supply lines, and drainage systems. Follow manufacturer guidelines and local building codes for safe and proper connections. Gas appliances require special attention to gas line connections, venting, and leak testing.
Ventilation and Exhaust:
Install ventilation ducts or exhaust systems for appliances that require proper airflow and venting, such as range hoods, cooktops, ovens, dryers, and bathroom fans. Ensure venting meets safety standards and effectively removes heat, moisture, and fumes.
Securement and Anchoring:
Secure appliances to prevent tipping, shifting, or movement during operation. Use anchoring brackets, straps, or fasteners as recommended by the appliance manufacturer. This is crucial for appliances like ranges, ovens, refrigerators, and dishwashers.
Testing and Calibration:
Conduct initial testing and calibration of appliances to ensure they operate correctly. Test functions such as temperature settings, water flow, heating elements, fans, lights, controls, and safety features. Make any necessary adjustments or settings according to user manuals.
Safety Checks and Inspections:
Perform safety checks, leak tests, and inspections to verify that appliances are installed correctly and comply with safety standards. Check for gas leaks, water leaks, electrical faults, and ventilation issues. Test smoke detectors and carbon monoxide detectors if applicable.
User Instructions and Maintenance Tips:
Provide homeowners or users with instructions for operating appliances, including safety precautions, maintenance recommendations, troubleshooting tips, and warranty information. Educate users on proper care and usage to prolong appliance lifespan and prevent accidents.
Cleanup and Final Touches:
Clean up any debris, packaging materials, or residues from the installation process. Ensure that appliances are clean, functional, and ready for use. Demonstrate appliance features and functions to users if necessary.
Professional appliance installers, technicians, or contractors typically handle the appliance installation process to ensure proper setup, safety compliance, and user satisfaction. Following manufacturer guidelines, building codes, and industry best practices is essential for a successful appliance installation that meets quality standards and performance expectations.